Manga Speech Bubble Chocolate Discs
Chocolate / dried fruits / orange
The bubble is CRAC.
Kitchen Mode and Timer
Keep the recipe at hand during preparation.
Enables JavaScript to use the kitchen tools.
Visual Timer: Keeps this page open. It does not sound an alarm. The cooking remains to be monitored.
That's all you need!
Equip me with a pack.If you miss something, choose your ingredients from Monoprix and your utensils on Amazon. Adjust the quantities to your guests, then uncheck what you already have.
Choose the number of guests and uncheck what you already have at home.
This sheet indicates a yield in parts or in weight. Specify your basis for calculating the races.
Your selection contains only the checked items. Check products and availability at Monoprix for ingredients, on Amazon for utensils.
Amazon Affiliate Links. As an Amazon Associate, I earn from qualifying purchases.
Your choices are memorized on this device.
It's up to you.
13 detailed steps, from preparation to service.
Installing a perfectly dry station
Prepare a scale, two bowls, a spatula, a kitchen thermometer and a baking paper-covered baking tray. Wipe each utensil: a drop of water can make the chocolate thicken. Weigh 250 g of dark couverture chocolate and chop it; separate 165 g in large bowl and 85 g in small container. The white chocolate remains apart for the finish. First check the tempering curve written on your chocolate and follow it first; the temperatures below are those of a black blanket of type Valrhona.
Roasting nuts
Preheat the oven to 150 °C, conventional oven setting (no fan). Spread the 24 almonds and 24 hazelnuts on a baking tray, without overlaying them, then bake for 8 minutes. They must smell the roasted fruit without darkening strongly. Remove the pan with oven gloves and pour the fruit into a bowl to stop cooking; let them cool completely, about 20 minutes.
Prepare all toppings at your fingertips
Weigh 30 g of raisins and 30 g of candied orange peel. Cut the peels into small dice of 4 to 5 mm and separate the glued raisins between them. Mentally divide the fillings into 24 batches: an almond, a hazelnut, some raisins and some orange diced for each chocolate discs. Everything must be cold before touching the chocolate.
Melt the one hundred and sixty-five grams
Pour 2 cm of water into a saucepan and bring it to a very slight quiver. Place on top of the large bowl containing 165 g of chocolate, without contact between the bottom of the bowl and the water. Stir with a spatula and measure the temperature in the center of the chocolate, without touching the bowl with the probe. Remove from the bath as soon as the chocolate reaches 50 to 55 °C.
Lowering the temperature
Wipe the bottom of the bowl and add the remaining 85 g of dark chocolate in two or three times. Stir slowly between each addition, scraping the edges well, until the pieces melt and the temperature drops to 28-29 °C. Take the time to measure: adding all the pieces without controlling the temperature does not replace this tempering step.
Bringing chocolate back to its working temperature
Place the bowl on warm water for a few seconds, remove and mix. Repeat very briefly until you reach 31-32 °C, without exceeding 32 °C. Chocolate should be smooth and shiny. Keep the probe and spatula dry; if it thickens during training, warm it up for a few seconds in this way, without putting water or oil back into the bowl.
Draw marks on paper
Draw in pencil 24 ovals 5 cm long with a small tail 8 mm wide on the side, like a comic book bubble. Turn the paper so that the chocolate does not touch the pencil. Plan at least 2 cm between the bubbles and place the sheet on a flat plate.
Spreading discs in small series
Place a small spoonful of chocolate on a marker and spread it with the back of the spoon to form an oval 2 to 3 mm thick. Push a little chocolate towards the tail and keep a wide junction with the oval so that it does not break. Prepare only four bubbles at a time, then garnish them immediately.
Put the fruit before taking
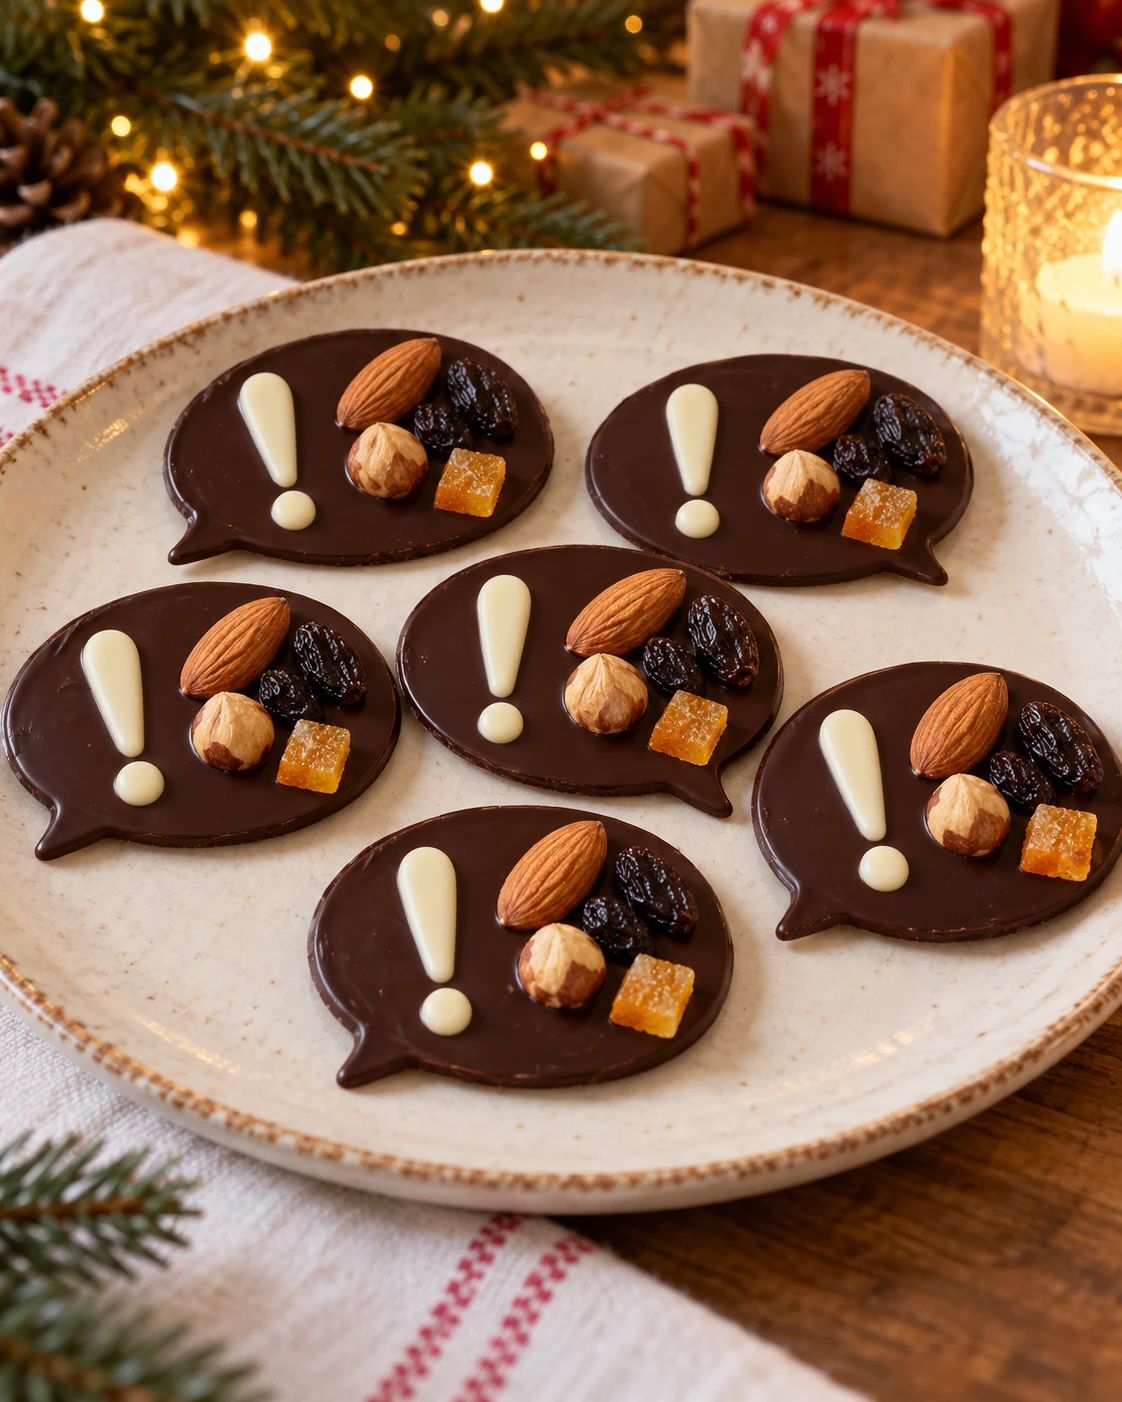
On the right half of each still flexible bubble, place an almond and a hazelnut then spread the raisins and orange dice. Press very lightly with the tip of a spoon so that they adhere, without crossing the layer of chocolate. Repeat until 24 pieces; spread the last toppings between them rather than leaving a chocolate discs without fruit.
Let crystallize without moving the pallets
Leave the plates flat for about 1 hour in a cool, dry room, ideally around 18-20°C. The chocolate should become firm, peel off without bending and no longer mark under a light touch. Do not move the pallets as long as they are flexible. Keep them on their paper to then add the white patterns without breaking them.
Melt the chocolate of the signs
Chop 60 g of white chocolate with a knife and put it in a small, perfectly dry bowl. Place the bowl on a saucepan containing 2 cm of barely simmering water, without the bottom of the bowl touching the water. Stir gently with the spatula and remove the bowl as soon as the pieces are almost melted; continue to stir off the heat. Wipe the bottom of the bowl before moving it: no drop of water should enter the chocolate. Pour the chocolate into a small baking paper cone or piping bag, fold the top and cut an opening of 1 to 2 mm. Test on a piece of paper: the chocolate should flow with gentle pressure, without running on its own. Hold the tip a few millimetres above the surface and guide it with your hand, without dragging the decoration. Put a chocolate discs before you: the fruits occupy his right half, while the left half is free for the sign. Leave the pallets on the paper while you work, so as not to break the tail of the bubble.
Draw a legible exclamation point
In the free area of each bubble, draw a thick vertical white line of about 1.5 cm. Stop the pressure before lifting the tip, then drop a separate large dot just below. Keep a margin of dark chocolate around so that the sign remains legible. Repeat the 24 bubbles; if the cone cools and resists, warm it between the hands before continuing.
Take and then peel the bubbles
Let the white signs freeze for about 30 minutes. Make sure they no longer stick, then take off each bubble by folding the paper gently under it, without pulling by its tail. Store the chocolate discs in a box with paper between the layers. Spread the remaining white chocolate on the paper for another use, without weighing down the signs.
Conservation. 2 weeks in closed box at 16-20 °C, away from moisture.
Namely. Recipe proposal: follow the quantities and texture marks of the card. Indicative times. The rendering depends on the ingredients and materials used. The objects of the photographic decoration remain out of the dish.
Baking tips for this recipe
- Preheat the oven according to the plug and prepare the mold before mixing the last ingredients.
- Uses the dimensions and cooking mode indicated: a higher or wider mold changes the cooking of the center.
- Follow the visual cues of step by step in addition to the duration. Respect the intended cooling before unmoulding or decorating.
Substitutions and variations
Blond or brown raisins can be used at the same weight; retains the soaking step when it is planned.
Keep the type of chocolate provided for the structure or ganache. Switching from dark chocolate to white chocolate changes the balance: the quantities do not transpose directly.
More treats for your Christmas table
Recipes that share ingredients or the same preparation family.