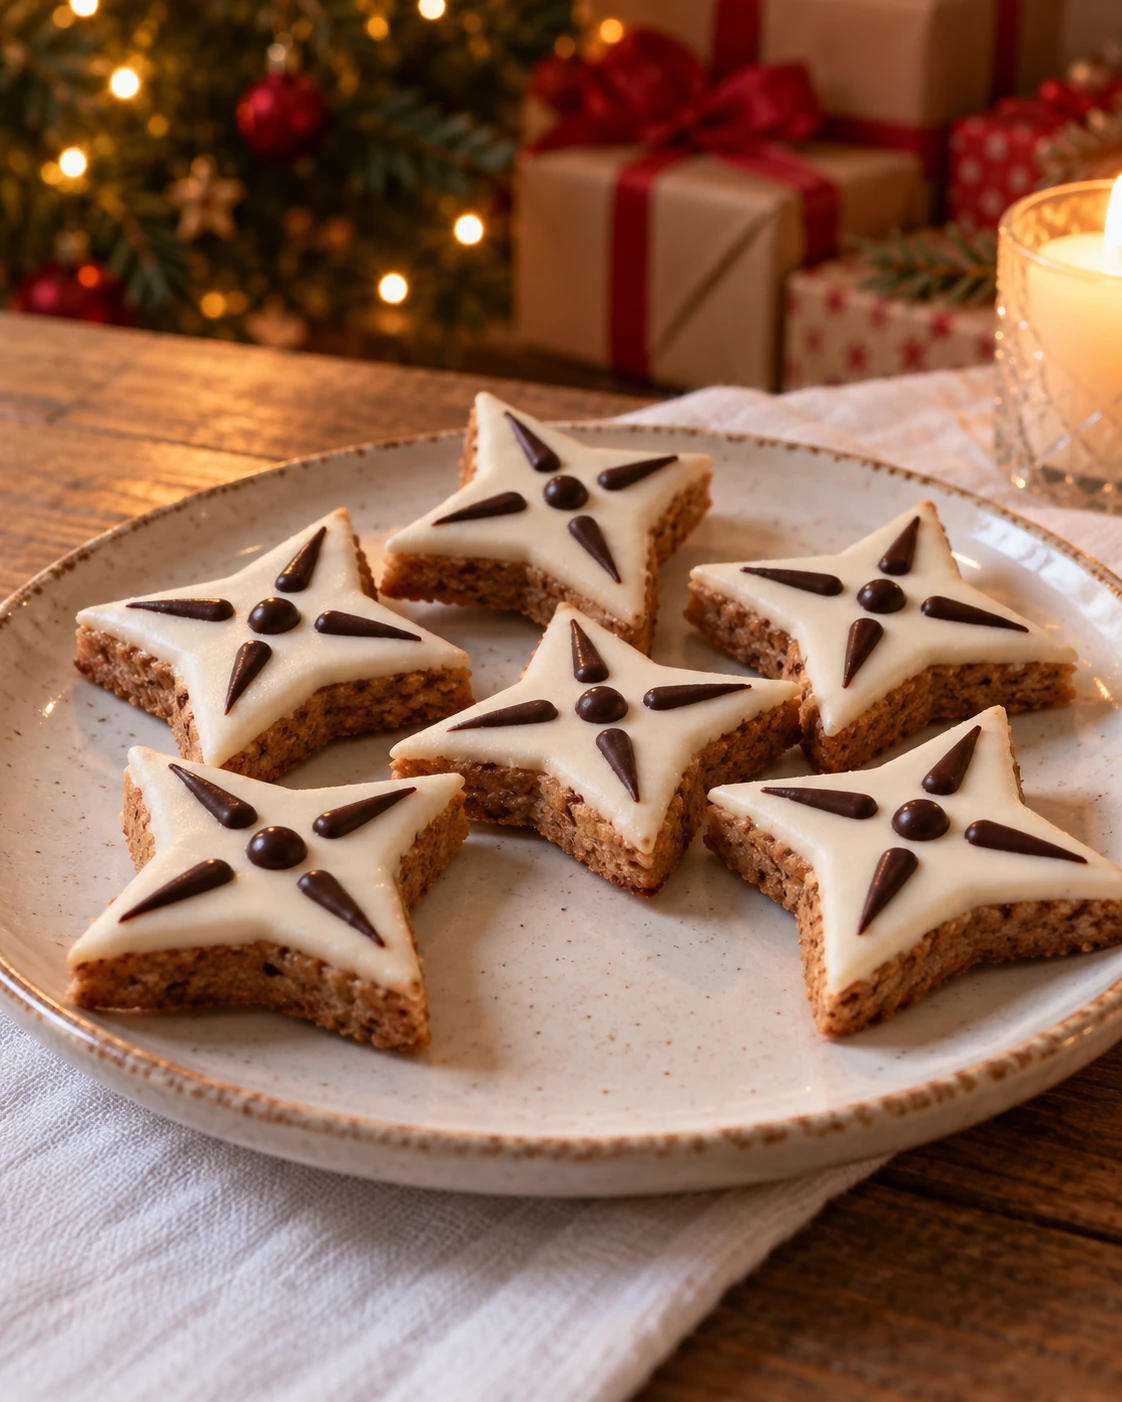
Cinnamon Shuriken Stars
Almond / cinnamon / dark chocolate
The only ninja star to bite.
Kitchen Mode and Timer
Keep the recipe at hand during preparation.
Enables JavaScript to use the kitchen tools.
Visual Timer: Keeps this page open. It does not sound an alarm. The cooking remains to be monitored.
That's all you need!
Equip me with a pack.If you miss something, choose your ingredients from Monoprix and your utensils on Amazon. Adjust the quantities to your guests, then uncheck what you already have.
Choose the number of guests and uncheck what you already have at home.
This sheet indicates a yield in parts or in weight. Specify your basis for calculating the races.
Your selection contains only the checked items. Check products and availability at Monoprix for ingredients, on Amazon for utensils.
Amazon Affiliate Links. As an Amazon Associate, I earn from qualifying purchases.
Your choices are memorized on this device.
It's up to you.
13 detailed steps, from preparation to service.
Prepare the whites and separate the sugars
Take 2 eggs. Break them one by one over a small bowl and separate the white from the yolk by passing the yolk between the two half-shells; pour each clean white into a second bowl. No piece of yolk should remain in the whites. Weigh 60 g of whites for this recipe and keeps the yolks in the refrigerator for another preparation. Prepare a perfectly clean and dry bowl to whip them. Weigh 160 g of icing sugar for meringue and keeps the extra 20 g in a small cup to spread the dough; these two amounts do not have the same use.
Start whisking the egg whites
Pour the 60 g of white into the bowl. Whisk with an electric mixer at medium speed until a white foam without visible liquid at the bottom, about 1 to 2 minutes. Then move to a slightly higher speed. Whip should leave traces in the foam, but it is not necessary to beat very firm whites before adding the sugar.
Add the sugar gradually
Add the 160 g of icing sugar in small spoonfuls, while continuing to whisk. Once scrape the walls then beat until a white meringue, shiny and thick. When you lift the stopped beaters, a tip should hold for a few seconds without falling back down immediately. This usually takes 3 to 5 minutes after the beginning of the addition of sugar.
Reserve the icing before adding the almonds
Take three tablespoons of this meringue and put them in a small covered bowl in the refrigerator: they will be used to whiten the tops. In the remaining meringue, pour 250 g of ground almonds and 6 g of cinnamon. Add the 10 ml of lemon juice and mix with the spatula, from bottom to top, until you see no more powder pocket-size.
Firming the dough
Gather the dough in the bowl without kneading it for a long time. Cover and place in the refrigerator for 45 minutes. It remains naturally sticky because of almonds and meringue: do not add flour to make it dry. After resting, it must be able to be flattened between two sheets of paper without spreading on its own.
Spread to eight millimeters
Preheat the oven to 150°C in conventional oven setting (no fan) and places an oven rack in the bottom third. Saupowder lightly a sheet of baking paper with a portion of the reserved 20 g of icing sugar, lay the dough then powder slightly on top. Cover with a second sheet and spreads on the roll to 8 mm of regular thickness; keeps the rest of the sugar to peel and cut.
Cut twenty-four stars
Draw on paper a 5 cm star with four broad branches and slightly rounded points, then cut out the pattern. Lay it on the dough and follow the contour with a small knife, with no hole in the center. Remove the pattern after each cut, group the offcuts and spread them again until you get 24 stars.
Spread the reserved icing
Slide a spatula under each star and place it on the baking sheet, with 2 cm of space around it. Take the three spoons of reserved meringue and distribute them in small quantities on the 24 tops. Spread with the back of a small spoon to the branches, in a thin layer, without leaving large runs on the sides.
Cook keeping the top white
Bake 12 to 14 minutes at 150 °C in the bottom third. The icing should look dry to the very light touch but remain white; the sponge should still look a bit supple. If the top begins to color, remove the plate rather than extending it to harden the center. The stars are mostly firming after the oven is out.
Waiting for full cooling
Leave the stars on their plate for about 45 minutes. Do not take them off when they are hot, as their spikes could break. They are ready for decoration when the underside is cold and the spatula lifts them from a single block. Prepare the chocolates only at this time so that they adhere without melting or softening the icing.
Preparing chocolate patterns
Chop 50 g of dark chocolate with a knife and put it in a small, perfectly dry bowl. Place the bowl on a saucepan containing 2 cm of barely simmering water, without the bottom of the bowl touching the water. Stir gently with the spatula and remove the bowl as soon as the pieces are almost melted; continue to stir off the heat. Wipe the bottom of the bowl before moving it: no drop of water should enter the chocolate. Pour the chocolate into a small baking paper cone or piping bag, fold the top and cut an opening of 1 to 2 mm. Test on a piece of paper: the chocolate should flow with gentle pressure, without running on its own. Hold the tip a few millimetres above the surface and guide it with your hand, without dragging the decoration. Arrange the cold stars in front of you, their four branches clearly visible. Check that the white icing is dry and that you can move them with a spatula without bending a tip before starting.
Draw the center and the four branches
Place a large black dot in the center of each star. Then draw four broad lines from this center to the four branches, stopping a few millimeters before the ends. Each line should remain on the white icing, without flowing to the sides. Make a simple and legible pattern; no central hole or metal decoration is necessary.
Allow to freeze before superimposing
Leave the stars flat for 30 minutes in a cool room. Touch a test line on the paper to check that it is firm, then move the cookies with a spatula and store them in a box. Put paper between the layers to protect the reliefs. The remaining chocolate can harden on the paper into pellets reserved for another preparation.
Conservation. 5 days in hermetic box in the cool and dry.
Namely. Recipe proposal: follow the quantities and texture marks of the card. Indicative times. The rendering depends on the ingredients and materials used. The objects of the photographic decoration remain out of the dish.
Baking tips for this recipe
- Use a clean bowl and whisks, without a trace of fat, to whisk the whites.
- Follow the order of sugar addition and step-by-step temperatures: they depend on the preparation.
- Stop whipping to the texture described in the recipe; do not add any cooking or drying that is not provided for in the steps.
Substitutions and variations
To replace a main ingredient, choose another sheet designed with the one you want to use. Changing the proportions of fat, sugar or liquid can change the hold of the dessert.
Keep the type of chocolate provided for the structure or ganache. Switching from dark chocolate to white chocolate changes the balance: the quantities do not transpose directly.
More treats for your Christmas table
Recipes that share ingredients or the same preparation family.