
THE FESTIVAL CARNET
American Red Velvet Christmas Cake
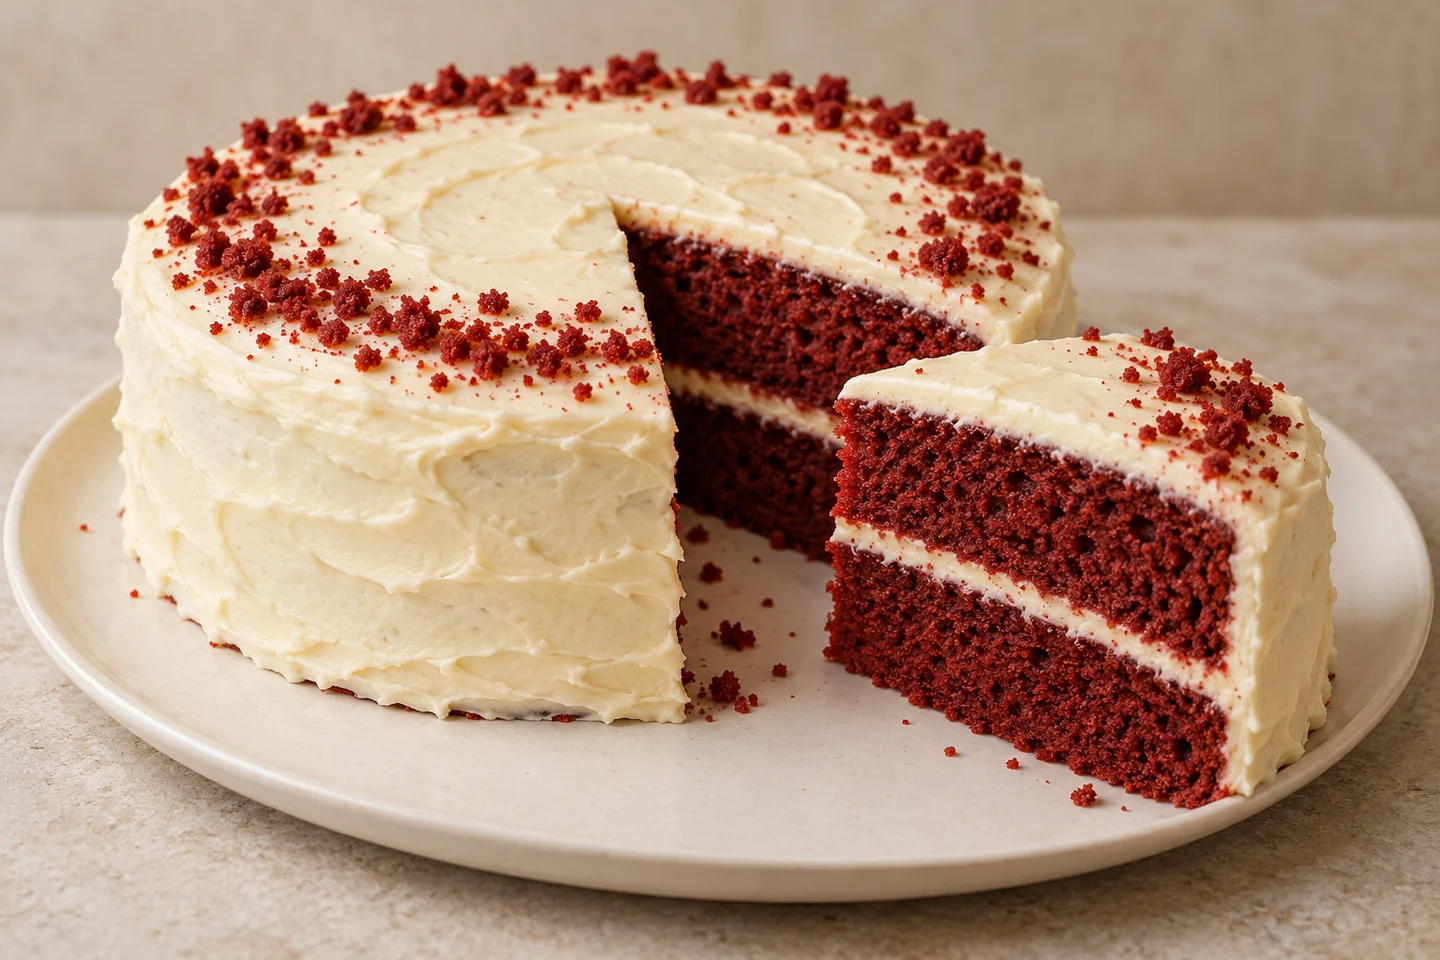
A two-disc Christmas red velvet of 20 cm, with a fresh cheese icing and a decoration of red crumbs, without complicated assembly.
Kitchen Mode and Timer
Keep the recipe at hand during preparation.
Enables JavaScript to use the kitchen tools.
Visual Timer: Keeps this page open. It does not sound an alarm. The cooking remains to be monitored.
For a simple American Christmas cake to share, this red velvet combines two fluffy discs, a light note of cocoa and a fresh cheese icing. Fermented milk provides the characteristic acidity of the dough. The red hue depends on the cocoa and coloring used: the taste and cooking count more than a very bright red.
The assembly remains low, with only a layer of cream between the two cookies. The decor uses the crumbs taken by slightly equalizing the tops: no figurine, no work of fondant. Two 20 cm molds allow the discs to be cooked together. Let them cool completely before preparing the icing, then allow an hour in the refrigerator to firm up the assembled cake.
That's all you need!
Equip me with a pack.If you miss something, choose your ingredients from Monoprix and your utensils on Amazon. Adjust the quantities to your guests, then uncheck what you already have.
Choose the number of guests and uncheck what you already have at home.
This sheet indicates a yield in parts or in weight. Specify your basis for calculating the races.
Your selection contains only the checked items. Check products and availability at Monoprix for ingredients, on Amazon for utensils.
Amazon Affiliate Links. As an Amazon Associate, I earn from qualifying purchases.
Your choices are memorized on this device.
The preparation step by step
Prepare moulds and ingredients
Preheat the oven to 175 °C in conventional oven setting (no fan). Butter the two moulds with the 10 g of butter provided, then cover their bottom with a baking paper disc. Remove the eggs, fermented milk and 120 g of butter from the dough early enough so that they are no longer cold at the time of mixing.
Mixing dry ingredients
Stir together the 250 g of flour, the 12 g of cocoa and the 4 g of bicarbonate over a bowl. Add the pinch of salt and mix with the manual whisk. Cocoa must disperse without small clumps. Do not replace bicarbonate with the same amount of baking powder: their action is not identical.
Whisk butter and sugar
In another bowl, whisk the 120 g of soft butter from the dough with the 200 g of sugar for 3 to 4 minutes. The mixture should become clearer and creamier, without cold butter pieces. Scrape the walls with the spatula in the middle of the whipping to mix also the part remained on the edges.
Add eggs and aromas
Break an egg into a small bowl to check for the absence of shell, then add it to the sweet butter by gently whisking. Start again with the second egg. Fold in the vanilla teaspoon and the red dye, without exceeding the dose indicated on its packaging. The final color will be a little different after adding cocoa and baking.
Finish the dough without working it too much
Add a third of the flour-cocoa mixture, then half of the 220 g of fermented milk, slowly mixing. Repeat, then finish with the last third of dry ingredients. Incorporate the 5 g of vinegar and stop as soon as the dough is homogeneous. Scrape the bottom with the spatula to check that there is no hidden flour left.
Spread and cook the two discs
Immediately distribute the dough between the two molds, ideally by weighing them to obtain two layers of near thickness. Smooth then bake side by side, without the moulds touching, for 25 to 30 minutes. A skewer planted in the center should come out without liquid paste, with possibly some wet crumbs. Do not wait for the edges to become dry.
Cool the cakes completely
Let the cakes rest for 10 minutes in their molds, then pass a thin blade on the edge and unmold them on a wire rack. Remove the baking paper and let cool for about 1 hour 50 minutes more. Check the underside with your hand: no heat should remain before icing, otherwise the butter and fresh cheese would soften.
Prepare a fresh cheese icing
Whisk the 120 g of butter from the icing with the 220 g of sieved icing sugar and vanilla for 2 to 3 minutes, first slowly. Add the 300 g of whole fresh cheese, without visible liquid, in three servings. Mix only until a smooth cream is obtained. If it is too soft to spread, refrigerate it 20 minutes before continuing.
Equalize the tops and keep the crumbs
Put the cooled discs on a board. If their tops are domed, remove a very thin cap with a bread knife held horizontally, without cutting the cakes into several floors. Put these offcuts in a small bowl for the decor. If the discs are flat, simply take a small spoonful of crumb on their inner side.
Assemble two stable layers
Place a small hazelnut of icing in the center of the dish to stabilize the first disc. Spread about 180 g of icing on its surface, keeping a regular layer. Place the second disc on top, facing the flattest at the top, and gently adjust its centering. Do not press hard: the cream should not come out in a bulge.
Cover with a simple layer of cream
Spread the rest of the icing on top and sides with a spatula or the back of a spoon. starts with a thin layer to fix the crumbs, then spread the rest without looking for a perfectly smooth finish. Some broad traces of spatula give a feasible home decor and keep visible the material of the cream.
Decorate and let firm before serving
Sprinkle the red crumbs reserved as crowns on top, without covering all the white cream. Place the cake in the refrigerator for at least 1 hour to stabilize the icing. Take it out about 15 minutes before the service, then cut ten parts with a large clean knife. Wipe the blade between the slices to keep layers readable.
Conservation. Store the cake covered in the refrigerator, at 4 °C maximum, for 3 days. The two unfilled discs can be frozen for one month, well packed after cooling; thawing them in the refrigerator before assembly.
Recipe proposal with quantities and step by step. Times vary depending on the material: follow also the markers of texture and cooking.
The benchmarks for success
Choose a firm fresh cheese
Use a whole cream cheese. A white cheese, a light specialty or a very watery product would make the icing more liquid.
A reasonable red
Follow the dosage of the dye, even if the cake remains brown red. Increasing the dose strongly does not replace a dye intended for cooking.
Questions Before You Start
Can it be prepared without dye?
Yeah. The cake will be reddish brown to brown depending on the cocoa, but will retain its texture and taste. The amount of dye is not necessary to hold it.
What to do with a single 20 cm mold?
Prepare and cook two successive half-recipes, letting the pan cool down before the second. Do not hold half of the activated dough for cooking.
Can this recipe be used to build four tiers?
This plug provides two discs and a single layer of trim to remain stable. Do not cut each disc in half without reviewing the quantities and mounting.
Baking tips for this recipe
- Preheat the oven according to the plug and prepare the mold before mixing the last ingredients.
- Uses the dimensions and cooking mode indicated: a higher or wider mold changes the cooking of the center.
- Follow the visual cues of step by step in addition to the duration. Respect the intended cooling before unmoulding or decorating.
Substitutions and variations
To replace a main ingredient, choose another sheet designed with the one you want to use. Changing the proportions of fat, sugar or liquid can change the hold of the dessert.
More treats for your Christmas table
Recipes that share ingredients or the same preparation family.