Read the recipe and weigh the ingredients
Make room in the refrigerator for the serving plate. Weigh each group of ingredients separately: keep the decoration chocolate separate from the chocolate for the ganache. Cut a sheet of baking paper to the dimensions of the baking tray, with a small edge. Prepare a second sheet of baking paper for turning out the sponge. Cooling stages can overlap; never fill a warm sponge with cream.
Prepare the ganache first
Chop the 300 g of dark chocolate and put them in a dry bowl. Pour the 300 g of cream into a saucepan and heat until the first small bubbles around the edge. Remove from the heat. Pour a third of the cream over the chocolate, wait 30 seconds and then stir with a spatula in small circles in the center. Add the second third and then the last in the same way. The mixture should become smooth and glossy, with no lumps. Do not whisk it.
Let the ganache become spreadable
Pour the ganache into a large container, press cling film directly onto the surface and let cool for about 20 minutes. Then place it in the refrigerator for 30 to 60 minutes, stirring every 10 to 15 minutes. It should hold on the spatula but spread easily without tearing the sponge. If it is runny, chill it longer; if it becomes too firm, leave it at room temperature for a few minutes. Times vary depending on the chocolate.
Preheat the oven and crack the four eggs
Preheat the oven to 180 °C, conventional setting (no fan). Position the oven rack in the middle. Break the 4 eggs one by one in a small bowl to easily remove any shell, then pour them into the large bowl. Add 100 g of sugar and a pinch of salt. It is not necessary to separate the whites from the yolks.
Whisk to the ribbon stage
Beat the eggs and sugar with an electric mixer for 7 to 10 minutes. The mixture should become pale and increase significantly in volume. When you lift the beaters, the falling batter should leave a visible trail on the surface for a few seconds: this is the ribbon stage. If it disappears immediately, whisk for another minute before checking again.
Fold in the dry ingredients without deflating the mixture
Sift the 100 g flour over the bowl in three additions. After each addition, slide the spatula down to the bottom, lift the batter over the top and turn the bowl slightly. Do not use the whisk again. Stop as soon as no pockets of flour remain, checking the bottom of the bowl too. Immediately spread the batter evenly over the entire 30 x 40 cm tray, including the corners.
Bake until set but still flexible
Bake for 10 to 12 minutes. Check after 10 minutes: the surface should be set and spring back slightly when touched, with no wet batter. An overbaked sponge will crack when rolled. Use oven gloves to remove the tray. Rest for a minute, then turn the sponge out onto the second sheet of baking paper. Gently peel off the original baking paper, pulling it back almost flat.
Roll up the warm sponge
With the 30 cm side facing you, make a small initial fold, then roll the warm sponge along its 40 cm length. For this initial roll only, keep clean baking paper between the layers to prevent sticking. Place the roll seam-side down and cool for 25 to 30 minutes. It should be at room temperature before adding the ganache.
Fill and roll without paper inside
Take 220 g of ganache for filling, 280 g for coating and 100 g for fittings and decorations. Gently unroll the cooled sponge, peeling away the paper as you go. Spread the filling, leaving 1 cm clear at the edges and 2 cm at the closing edge. Roll up again using the paper underneath to guide it, keeping the paper outside the cake this time. Place seam-side down, wrap and refrigerate for 45 to 60 minutes.
Cut the two decks
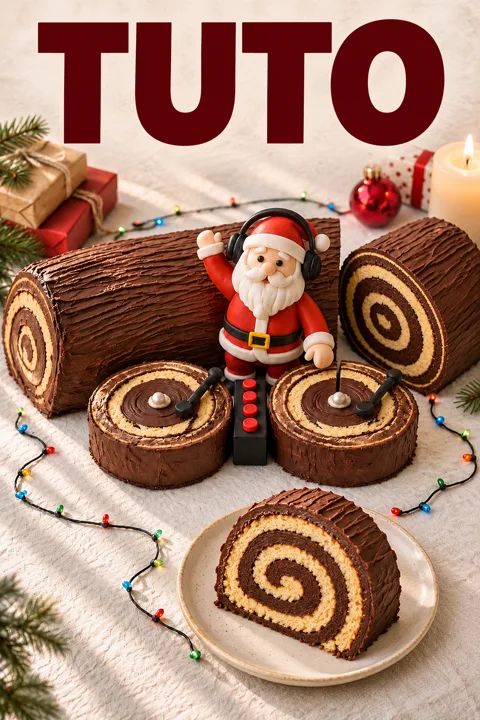
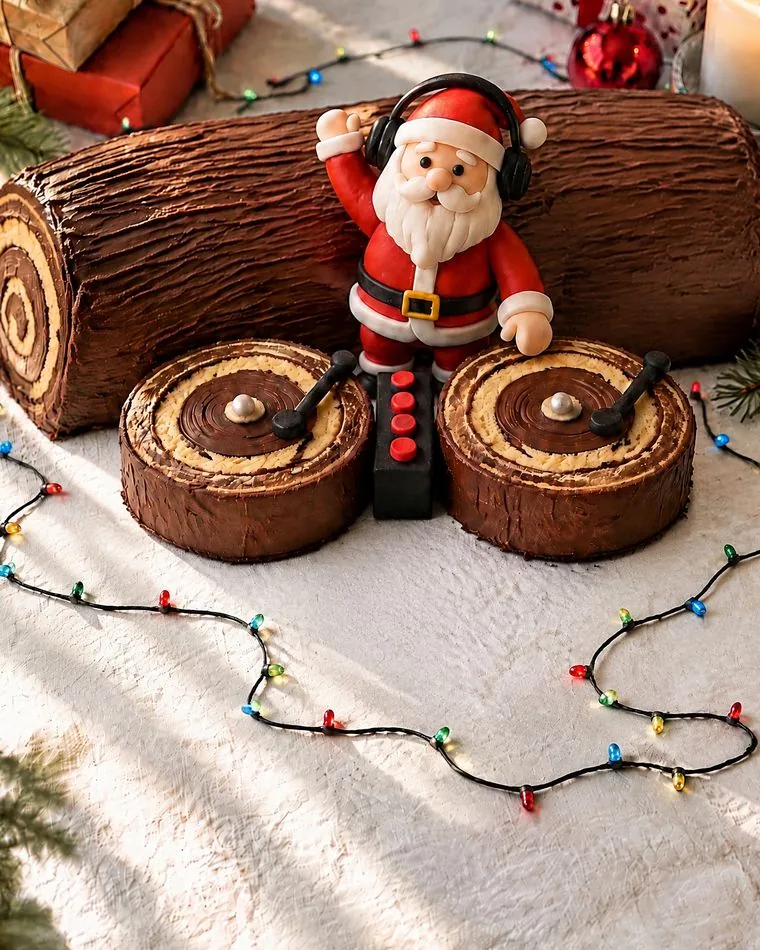
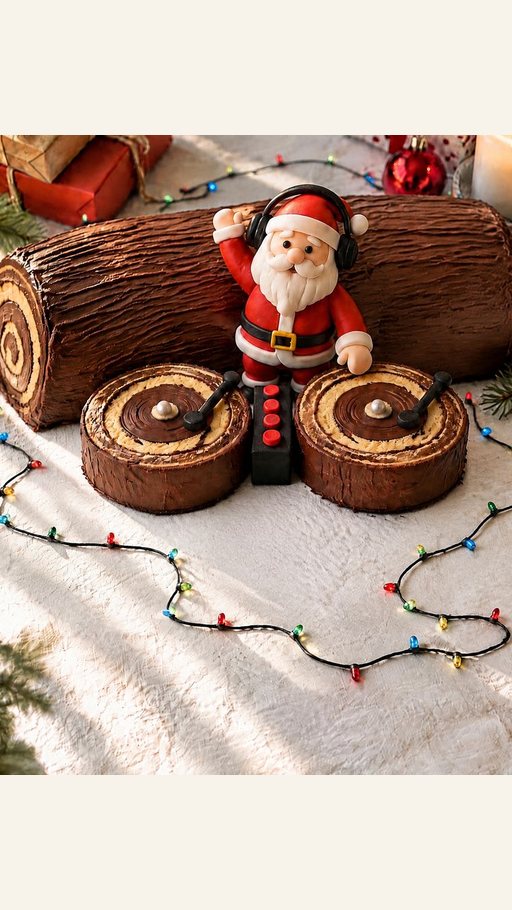
Take out the cold log and cut two 2 cm slices at one end with a bread knife. Lay them flat in front of the roll, spiral upwards. Cover the roller and the outer edge of the slices with 280 g of coating ganache, then traces streaks with a fork on the roller. Keep the spirals of the two turntables visible.
Make chocolate discs
Draw two circles 5 cm in diameter on a sheet and cover it with baking paper. Melt the 60 g of dark chocolate in a soft bain-marie. Spread two discs 2 to 3 mm thick. When the chocolate begins to thicken, draw a few circles with a spoon tip without crossing the disc. Let it take 20 minutes, then glue each disc to the center of a slice with a hint of ganache.
Building a Stable Santa
Reserve 10 g of red paste for the buttons. With about 65 g of red, forms a pear body 4 cm high, wide at its base. Use 15 g for two small arms leaning against the body and 10 g for a cap. Lay the body sitting directly on the plate, between the decks and against the log. Do not make it stand with a spike: its base must support it.
Add head, beard and cap
With 20 g of peach paste, rolls a head of 2 to 2.5 cm; the rest serves two small hands and a nose. Sticks the head on the body with a trace of ganache. Take about 20 g of white for a flat beard in drop, 10 g for the edge of the cap and a pompom, and uses the rest in small touches for the wrists and details of the turntables. Two tiny black dots are enough for the eyes. Keep the face simple, without sculpting fine features.
Shaping the headphone and mixer
With about 15 g of black, forms two earphone discs and a small pudding that follows the top of the head; glue them with a trace of ganache. With 20 g of black, forms a flat rectangle of 5 x 2 cm in front of the DJ. Add four small red buttons taken from the reserve. Use the remaining black for a belt and two small reading arms laid flat on the discs. The yellow paste serves as a simple loop on the belt.
Assemble without hidden accessories
Place each hand against a turntable or the body so that it is supported. Sets the decors with the minimum of reserved ganache and lets take in the cool 30 minutes. For the presentation, a garland remains on the table, out of the dish and without contact with food; it does not enter the recipe. Remove the character to share separately when you slice.
Storage and serving
Keep the log in a box in the refrigerator and consume it within 48 hours. Take it out for about 15 minutes before serving. Lay fragile decorations at the last moment; do not leave the cream for several hours at room temperature.
Recipe proposal with quantities and step by step. The times are indicative. The video and images illustrate a creation; hand-crafted sets can be simpler.

 01 / The Creation