
THE FESTIVAL CARNET
Braided Christmas Brioche
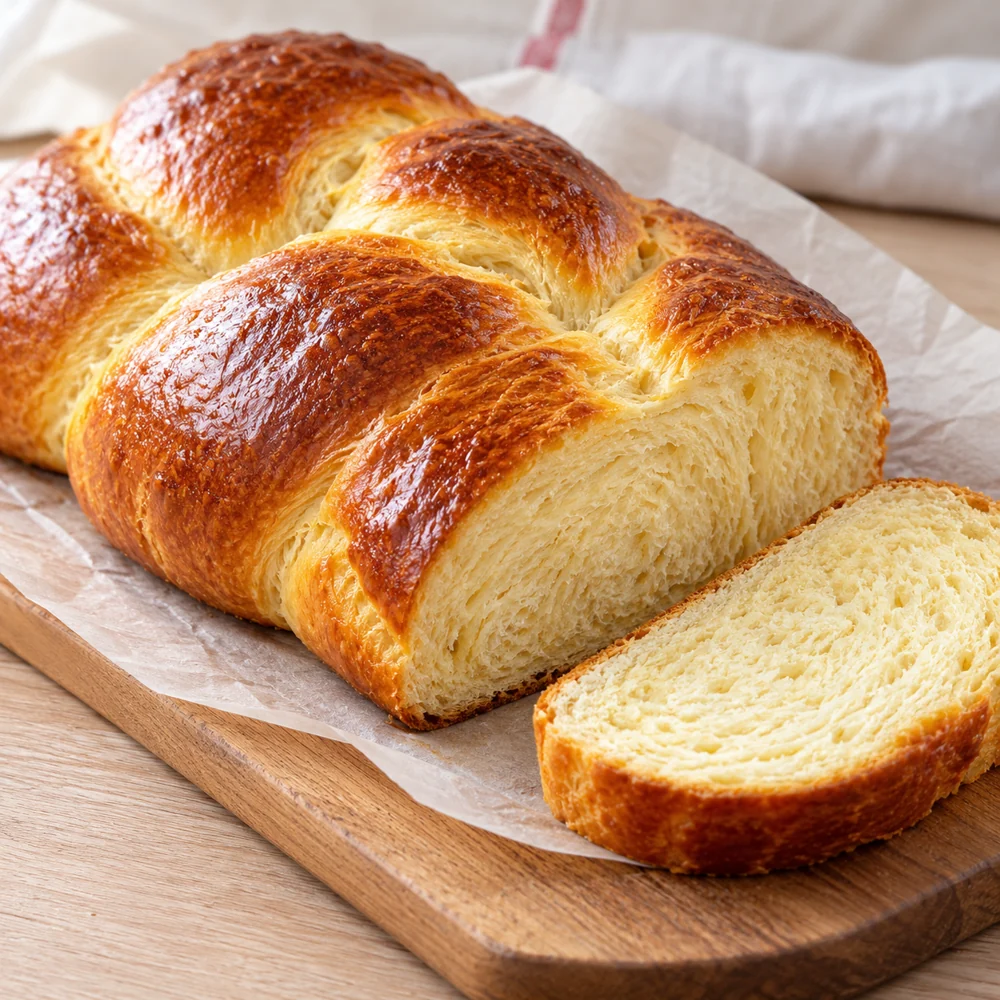
Prepare a natural three-stranded Christmas brioche, with a gradually kneaded butter dough, two lifts and a fine egg gilding.
Kitchen Mode and Timer
Keep the recipe at hand during preparation.
Enables JavaScript to use the kitchen tools.
Visual Timer: Keeps this page open. It does not sound an alarm. The cooking remains to be monitored.
Prepare a natural three-stranded Christmas brioche, with a gradually kneaded butter dough, two lifts and a fine egg gilding. This version is designed for a home kitchen, with weighed quantities and visual cues. Prepare the ingredients before starting and reserve the indicated cooling time: it is part of the recipe.
Read the whole steps before working on the dough. The durations remain indicative; a raised dough must actually swell, a cookie must cool before being handled and a wet filling requires a cool storage.
That's all you need!
Equip me with a pack.If you miss something, choose your ingredients from Monoprix and your utensils on Amazon. Adjust the quantities to your guests, then uncheck what you already have.
Choose the number of guests and uncheck what you already have at home.
This sheet indicates a yield in parts or in weight. Specify your basis for calculating the races.
Your selection contains only the checked items. Check products and availability at Monoprix for ingredients, on Amazon for utensils.
Amazon Affiliate Links. As an Amazon Associate, I earn from qualifying purchases.
Your choices are memorized on this device.
The preparation step by step
Prepare equipment and reserves
Weigh 400 g of flour, 65 g of sugar, 7 g of yeast and 5 g of salt in separate bowls. Cut the 90 g of soft butter into cubes. Prepare the specified baking tray or mold with baking paper; shaping will be easier if everything is already at hand.
Prepare eggs and milk
Break the 2 eggs of dough one by one into a bowl, check the shells and beat them with a fork. Keep the whole gilding egg apart. Heat the 140 ml of milk to about 30 °C, without making it hot.
Gathering the ingredients of paste
Mix flour, sugar and yeast in a bowl or in the bowl with the hook. If your yeast needs to be rehydrated, use some of the milk already measured, according to its bag. Add the beaten eggs and milk, then salt. Mix until all the flour is moistened.
Gives elasticity to the dough
Kneaded for 8 minutes at a slow speed, or about 12 minutes by hand by stretching and folding the dough. It remains slightly sticky. Scrape the edges when stopped and avoid throwing extra flour: it would make the brioche dry.
Fold in butter by small additions
Add 90 g of butter in three or four times. Wait for the first addition to be absorbed before the next. Continue for 8 to 10 minutes until you get a soft paste that stretches without breaking immediately. If it heats up or becomes oily, take a 10-minute break in the cool.
Fragrance without tearing the paste
Gather the dough in a spatula: this version does not require an incorporated filling. Make a soft ball and place it in a bowl. Cover to prevent the surface from drying out during lifting.
Let it rise slowly
Let stand for about 1 h 30 at 24 °C until the dough almost doubles in volume. Time depends on your room and yeast; watch the swelling rather than the clock alone. If it does not move, do not put it in a hot oven: check the temperature of the room.
Shape the planned form
Gently press the dough to evacuate the large bubbles, then divide it into three portions of the same weight. Roll three 35 cm rods. Weld their extremities on one side, alternately pass the flange on the right and the one on the left on the middle. Finish by pinching the ends and folding them underneath. Put the braid on the plate.
Wait for the second rise
Cover with a light cloth and lets inflate 45 to 60 minutes away from drafts. Parts should look flexible and light. Prevent swelling in the mold or on the plate. Towards the end of this wait, preheat the oven to 175 °C, conventional oven setting (no fan).
Dore without falling back
Break the gilding egg in a bowl and beat it with a fork. Brush a thin layer over the top, without pressing on the puffy dough. Do not let egg wash pool around the base of the pieces: it would brown too quickly.
Cuis by monitoring the color
Bake at mid-height for about 30 minutes. The surface should be golden and the underside cooked. If the top goes fast, cover it loosely with a sheet of baking paper. A probe in the center of a large brioche can aim at 92 to 94 °C; small parts can also be controlled by opening a control part.
Cool before serving
Go out with the oven gloves. Wait 10 minutes before unmolding a large brioche, then place on a wire rack. Allow to cool 1 hour before cutting; for small rooms, 30 to 45 minutes is enough. A still hot crumb gets mugged under the knife and looks wetter than after cooling.
Conservation. Store 2 days in an airtight box, after full cooling. Freeze in portions for up to 1 month for longer storage.
Recipe proposal with quantities and step by step. Times vary depending on the material: follow also the markers of texture and cooking.
The benchmarks for success
Respect the texture
Stop mixing, lifting or cooking at the mark described in the step by step. The indicated time remains an estimate: the temperature of the room and the power of the oven can change it.
Packs only cold
Let the indicated cooling finish before stowing. A box closed too early traps the steam and softens the surface.
Questions Before You Start
Why does the braid tear during cooking?
Too tight a braid leaves little room for the shoot. Cross the three strands without pulling them, then wait for the swelling of the second rise before browning.
Why do the strands retract?
The dough relaxes better after 5 to 10 minutes of break. Roll the three strands gradually and keep a length close to 35 cm for a regular braid.
How to preserve the texture?
Wait for complete cooling, then protect from air and adhere to storage instructions. Warm up only the portions of brioche you are going to serve.
Baking tips for this recipe
- Weigh the yeast and uses the type indicated in the recipe: yeast and yeast are not interchangeable.
- Observe the increase in volume during shoots. A cool room can lengthen the times indicated.
- Respect the dimensions of the mold and the amount of dough: a brioche too tight or too full does not cook in the same way.
Substitutions and variations
To replace a main ingredient, choose another sheet designed with the one you want to use. Changing the proportions of fat, sugar or liquid can change the hold of the dessert.
More treats for your Christmas table
Recipes that share ingredients or the same preparation family.